

A couple of weeks ago a twitter follower asked me if there was a HDR app available for Nokia N8, with it’s impressive 12Mpix Carl Zeiss lens. For this review I am focussing on Camera Pro, based on the impressive toolbox it provides alongside the it’s batch photography capability. Want to win ONE of FIVE copies of this product that we’re giving away in a contest? Simply read through the rest of this review.
The shear quantity of options within Camera Pro has caused me headaches writing this review as to how I structure it. I have ended up basing it on the menu screens within the app, so here goes. After a little searching I found a couple of apps, namely:
- Camera Pro – capable of batch photography which can be merged later on a PC.
- HDR Pro Camera – capable of batch photography and on device HDR merging.
Flash
Camera Pro offers all of the standard flash features offered by the Nokia N8 default Camera app, namely:
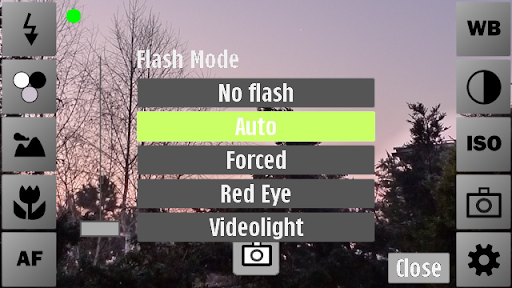
- No Flash – flash is turned off
- Auto – flash is automatically used if required
- Forced – flash is always on
- Red-eye – multiple flashes to reduce red-eye
Effects
The Effects is the first area that Camera Pro starts to offers extra features in Negative and Natural features with the remainder of the effects being duplications of the standard app.
- None / Normal – No effects applied
- Negative – colours are reversed.
- Black & White – image saved in black and white
- Sepia – image saved in sepia to provide an nostalgic look
- Vivid – colours are amplified to provide a more vivid image
- Natural – colours modified to provide a warmer feel
Exposure Mode
The exposure mode settings are a little harder to compare as names change as the target audience appears different between Camera Pro to the default app. For a start Camera Pro has no Close-up, Portrait, Landscape, or Night Portrait modes, although it does offer Backlight, Center and Very Long modes. The mode list is:
- Auto – exposure mode is automatically selected.
- Night – low light imagery, resulting in longer exposure.
- Backlight – compensation
- Center – exposure level is biased to the centre of the image
- Sport – faster exposure to minimise blur when shooting moving images
- Very long – longer exposure time than Night mode
Focus range
Focus Range is another interesting menu overlapping the standard app’s “Exposure Mode” with it’s inclusion of Auto focus and Macro options. Although face recognition is not available Camera Pro offers Hyperfocal and Infinite focal range.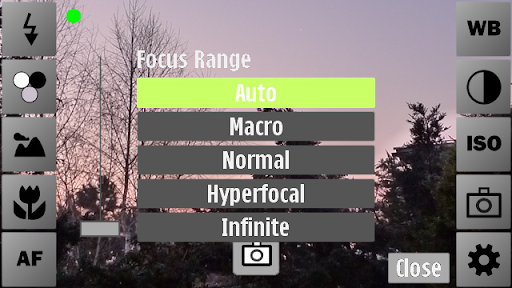
- Auto – focal range is automatically selected.
- Off – No auto-focus
- Single – focus set once
- Continuous – focus continuously adjusted
- Macro – the focal range is set for close–up shots.
- Normal – standard focus
- Hyperfocal – both closer and distant objects remain in focus
- Infinite – distant objects remain in focus although closer object may not
White Balance
White balance offers the same options as the standard app, namely:
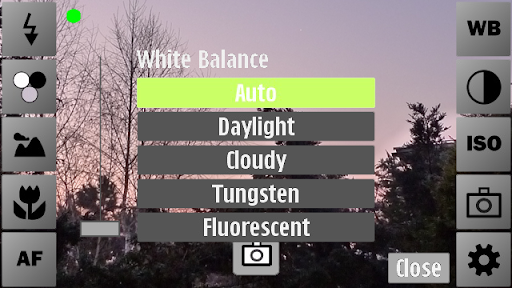
- Auto
- Daylight / Sunny
- Cloudy
- Tungsten / Incandescent
- Flourescent
Image Controls
This menu, again, provides the standard offerings, but with an extra level of detail.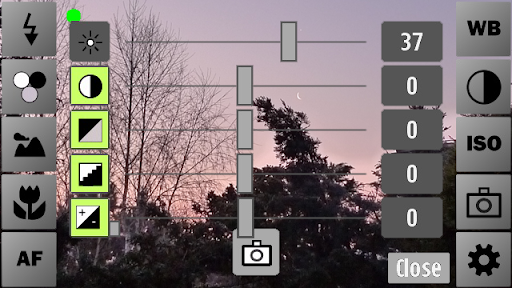
- Brightness (+/-100)
- Contrast (+/-100)
- Grey scale(+/-100)
- Sharpness(+/-100)
- Exposure Compensation (+/-200)
ISO Rate
The ISO rate menu is another area where Camera Pro provides more professional options when compared with the default app as rather than offering Auto, Low, Medium and High the user is presented with: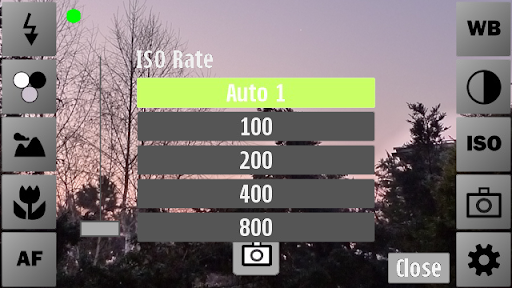
- Auto1 (Corrected to “Auto” in the latest internal update)
- 100
- 200
- 400
- 800
Camera Mode
Camera mode offers the standard Normal/Camera, Video, Self-timer and Anti-shake, but then adds bracketing, which can be used to produce HDR (High Dynamic Range) images using a PC based HDR merging app like Luminance HDR which is a free download. In addition to this Camera Pro provides burst ((2 to 6 shots) and time laps imagery.
The full lit is detailed below: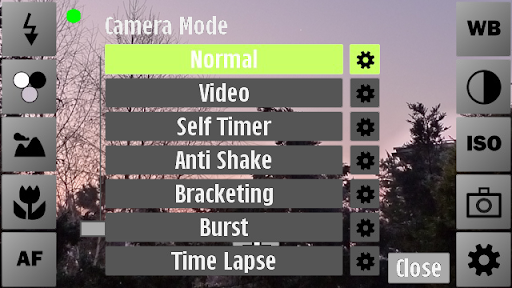
- Normal – Camera (Access to camera settings)
- Video – Video Camera (Access to video settings)
- Self Timer (>0 secs) – single shot with user defined delay.
- Anti Shake (Insensitive/Normal/
sensitive) – image stabilisation - Bracketing – 3 shots with exposure set for each shot between –200
(-2ev) and 200 Exposure (+2ev) - Burst – 2 to 6 shots in close succession
- Time Lapse (>1 sec) – multiple shots at a user defined interval
options
The last button icon on the main screen is the cog (bottom right) which opens a short options menu. At the top of this menu there are four button icons, which are, from left to right:
- 3×3 grid – a 3×3 grid overlay on the viewfinder screen
- 7×7 grid – a 7×7 grid overlay on the viewfinder screen
- Compass – a compass overlay in the top right corner showing the direction of pointing
- Crosshair – centre crosshair with integral indication of camera angle
Options – Presents
Presets are sets of settings (e.g. focus, exposure, etc.) which can be can be loaded, saved (user created) or deleted, with the initial “Load” list being taken from the default camera mode list, as detailed below: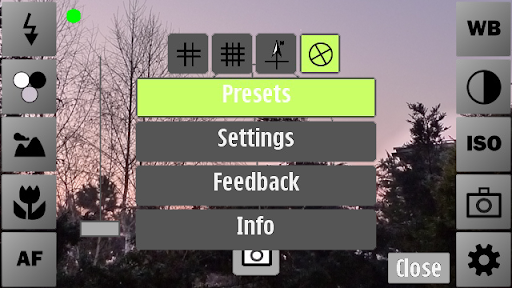
- Auto
- Close-up/Macro
- Portrait
- Landscape
- Sport
- Night
- Night Portrait
camera – Options – Settings
Finally we arrive at the Camera Options/Settings, offering image storage to any phone drive (C:/, D:/, E:/ or F:/), file prefix, a plethora of image size options (listed below), Image Quality (Min (0%) to Max (100%)) and options to automatically display the capture image, GPS tag, play sounds and single tap operation.
The list of available image sizes/resolutions is as follows:
- 4000×3000
- 4000×2248
- 3264×2448
- 3264×1832
- 2592×1944
- 2593×1456
- 2048×1536
- 1600×1200
- 1280×960
- 1024×768
- 640×480
Video – options – Settings
The main settings accessible from the main screen buttons are the same in Video mode with the only difference being within the Options/Settings menu although “Storage Location” is repeated with the same sub-menu (C:/, D:/, E:/ or F:/). The remaining options within settings are Video type (see list below) and on/off toggles for Audio Recording, Video Stabilization and Expert Mode (for experimentation only. Not all settings combinations work).
The extensive list of available image sizes/resolutions and frame rates combinations (Video types) is as follows:
- 1280×720 (h264, 30fps / 25fps)
- 864×480 (h264, 30fps / 25fps)
- 640×480 (h264, 30fps / 25fps)
- 640×480 (mp4v, 30fps / 25fps)
- 640×352 (mp4v, 30fps / 25fps)
- 352×288 (mp4v, 30fps / 25fps / 15fps)
- 320×240 (mp4v, 30fps / 25fps / 15fps)
- 176×144 (h263, 15fps)
image capture
Although image capture is comparable with the default camera app I did note that the currently available version has quite a dark viewfinder image, but this is corrected in the new version, due to arrive in the OVI Store in the next few weeks.

Standard Image
Camera Pro provides an increased level of zoom, although this is countered somewhat as the camera is only cable of digital zoom, meaning that the image is cropped reducing definition. The built-in camera app has the zoom range limited to a level which produces “acceptable” quality (from the Nokia engineer’s point of view), but there are situations where a higher zoom might be interesting (e.g. watching a bird on a tree). With maximum zoom it is important to use “single auto focus” and manually trigger the “single auto focus” (e.g. by slightly pressing the shutter key) after zooming to get a sharp picture.
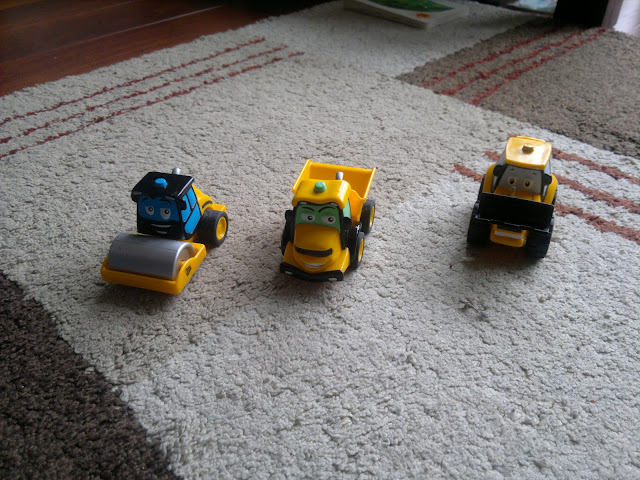
Minimum (Standard) Zoom

Maximum Zoom
Conclusion
This application is somewhat of a must buy with a price tag of £3 from the OVI Store as this is a bargain for so many extra features.
HERE IS A LINK TO DOWNLOAD IT FREE !!!
JUST DOWNLOAD TO N8 AND INSTALL USING QUICK OFFICE OR FILE MANAGER
PRIOR TAKING ANY MODIFICTIONS DETAILED ABOVE IS RESPONSIBLE FOR HIS OWN ACTIONS KNOWING THERE ARE RISKS INVOLVED. APP HAS BEEN TESTED ON AUTHOR'S N8 AND WILL NOT BE RESPONSIBLE IF IT IS NOT INSTALLABLE ON A DIFFERENT N8. THIS BLOG IS NOT RESPONSIBLE FOR ANY EFFECTS OF MOD , LEGAL IMPLICATIONS OR MOBILE CHARGES.
THANKS !


No comments:
Post a Comment